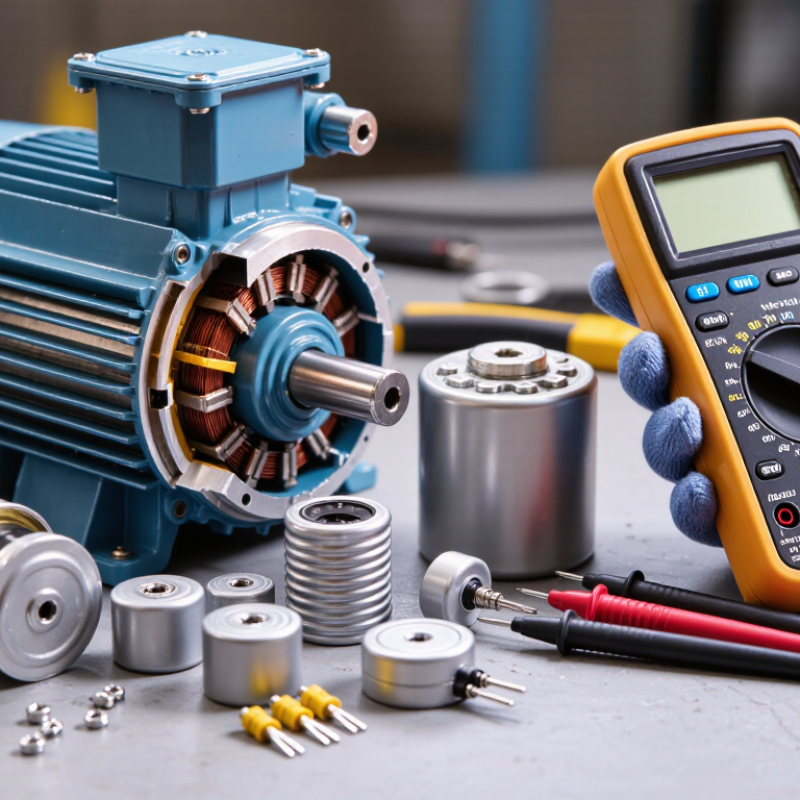
Choosing the right Run Capacitor begins with the motor, not the old part’s appearance. A shiny replacement can still be electrically wrong. The correct choice depends on capacitance, voltage rating, frequency, physical size, terminals, and the motor’s operating design. A technician should read the motor nameplate, inspect the wiring, and compare the manufacturer’s specifications before ordering anything.
HVAC educator and author John Barba often reminds technicians, “A capacitor is not a guess; it is a measured part of the system.” That principle matters when a compressor hums, overheats, or trips its breaker. The visible symptom may suggest a failed capacitor, but loose terminals, damaged windings, poor airflow, or an incorrect voltage supply can create similar problems. Testing matters.
A Run Capacitor remains connected while the motor operates. It helps maintain the phase relationship needed for smoother torque and efficient running. Its microfarad value must usually match the specified range closely. A higher voltage rating may be acceptable in many applications, but the capacitance value is not a casual upgrade. Bigger is not better.
Small details matter. Check the oval or round case. Confirm the terminal markings. Look for swelling, oil leakage, corrosion, or heat discoloration. Do not rely on color alone. Some assumptions fail here.
This guide will explain how to interpret capacitor labels, verify electrical ratings, match replacements, and avoid common installation errors. It will also examine when a meter reading needs further investigation. Choosing correctly is not merely a parts exercise. It is a careful decision about motor reliability, safety, and long-term operating cost.
A run capacitor stays connected while an AC motor operates. It creates a phase shift between the motor windings. This shift helps produce steady torque and smoother rotation. In a fan motor, it supports consistent blade speed and reduces electrical strain. Without the correct capacitor, the motor may hum, run slowly, or overheat.
Choose the capacitance rating shown on the motor label or service documentation. The value is measured in microfarads, often written as µF. The replacement should match that value closely. Its voltage rating must meet or exceed the original rating. A higher voltage rating is usually acceptable, but a lower one can fail early. Check the capacitor’s shape, terminals, temperature rating, and mounting space. Small details matter.
Tips: Turn off power and verify it with a meter before inspection. A capacitor can retain a charge. Let a qualified technician handle uncertain wiring. Watch the motor during operation. Excessive noise, a hot case, or weak airflow deserves attention. I once focused too much on the µF number and overlooked a loose terminal. That mistake changed the diagnosis. Measure carefully, and question assumptions.
How to Choose the Right Run Capacitor?
Identifying the required capacitance starts with the motor nameplate, wiring diagram, or original capacitor. Look for a value marked in microfarads, such as 35 µF, often followed by a tolerance percentage. The replacement should match this capacitance as closely as possible. Do not select a capacitor by its physical size alone. Small details matter.
Check the voltage rating carefully. It must be an AC voltage rating, such as 370 VAC or 440 VAC, not a DC rating. A replacement may have a higher voltage rating, provided its capacitance, frequency, terminals, and dimensions are suitable. Never install a capacitor with a lower voltage rating. In practical maintenance work, using the wrong rating can cause early failure, overheating, or unsafe pressure buildup.
Disconnect power and discharge the capacitor before testing it. A capacitance meter gives better results when the capacitor is removed from the circuit. A capacitor can look perfect and still be weak. Compare the measured value with its printed tolerance. Then observe the motor for humming, slow starting, unusual heat, or increased running current. These signs can reveal a deeper problem. A shortcut can look convincing, but it can be wrong. When the label is missing, consult the motor documentation or a qualified technician rather than guessing. I would also recheck the wiring, because a correct capacitor cannot compensate for a loose connection or damaged winding.
How to Choose the Right Run Capacitor?
Matching a run capacitor begins with the motor nameplate, not the old capacitor alone. Check the required capacitance, measured in microfarads (µF), and match that value closely. A small difference can reduce torque, increase heat, or cause uneven running. The motor may sound normal at first. That can be misleading.
The voltage rating must meet or exceed the motor’s operating voltage. Never use a lower-rated capacitor as a substitute. Confirm the AC frequency, phase, and continuous-duty requirement as well. A single-phase motor designed for a 40 µF capacitor should not receive a random 35 or 45 µF part without technical approval. Tolerance matters, especially in pumps, fans, and compressors that run for hours.
Physical details matter too. Measure the diameter, height, terminal layout, and mounting method before ordering. In field checks, I also inspect swollen cases, loose terminals, and darkened wires. These signs may point to overheating or another motor fault. I once focused too heavily on capacitance and overlooked a poor terminal connection. The replacement still ran badly. That mistake was useful, but avoidable. Disconnect power and discharge the capacitor safely before testing. Use a suitable meter, and compare the measured value with the printed tolerance. When the nameplate is unreadable, consult the motor’s service documentation or a qualified technician rather than guessing.
How to Choose the Right Run Capacitor?
A run capacitor must match the motor’s required capacitance, voltage, frequency, and application. Check the equipment service manual before reading the old label. The capacitance value should match closely, while the voltage rating may be equal or higher. A higher voltage rating does not correct the wrong capacitance. It is also important to select an AC-rated motor capacitor, not a visually similar substitute.
Safety comes before testing. Disconnect the power supply, lock it out when possible, and verify zero voltage with a suitable meter. Stored electrical energy can remain after shutdown. Use an approved discharge method and insulated tools. A capacitance meter can reveal weak or failed components, but readings should be compared with the stated tolerance. Do not rely on appearance alone. A swollen case, leaking seal, or burnt terminal requires replacement and further motor inspection. I once overlooked terminal discoloration because the measured value seemed normal; that was not a reliable decision.
Tips: Measure the mounting diameter and height. Check bracket clearance and terminal spacing. Confirm that wires can reach without tension. Leave room for airflow around the capacitor. Secure it against vibration. Photograph the connections before removal. Small details matter. When the label is unclear, pause and verify the manual, wiring diagram, or a qualified technician’s advice. Guessing can damage the motor.
| Selection Area | What to Check | Correct Requirement | Why It Matters | Recommended Action |
|---|---|---|---|---|
| Capacitance | Microfarad rating (µF) | Match the original motor specification or the equipment manufacturer's required value. Common run-capacitor values include 5, 7.5, 10, 15, 20, 25, 30, 35, 40, 45, and 50 µF. | Capacitance controls the phase shift and auxiliary-winding current. The wrong value can cause poor starting torque, overheating, noise, or reduced motor efficiency. | Use the same µF value whenever possible. Do not increase capacitance to compensate for a motor fault. |
| Capacitance Tolerance | Permitted variation | Check the tolerance printed on the capacitor, commonly ±5% or ±10%, and compare the measured value with the motor's allowable range. | A capacitor may not measure exactly its nominal value. Tolerance indicates the acceptable production variation under specified test conditions. | Replace the capacitor if the measured capacitance is outside its marked tolerance or the motor manufacturer’s limit. |
| Voltage Rating | AC working-voltage rating | The replacement voltage rating must be equal to or higher than the original rating and suitable for the motor circuit. Typical ratings include 250, 370, 440, and 450 VAC. | The voltage rating is the maximum continuous AC voltage the capacitor is designed to withstand under specified conditions. A lower rating can cause dielectric failure. | Never substitute a lower-voltage capacitor. A higher rating may be acceptable only when the capacitance, construction, temperature, and physical requirements also match. |
| Capacitor Type | Run capacitor versus start capacitor | Select a continuous-duty motor run capacitor, typically a metallized polypropylene film capacitor. Do not use a momentary-duty start capacitor in a continuous-running circuit. | Run capacitors are designed to remain energized while the motor operates. Start capacitors are intended for short-duration use and can overheat or fail if continuously energized. | Confirm that the label or datasheet identifies the component as a motor run capacitor and not a start capacitor. |
| Frequency | Electrical frequency | Confirm compatibility with the supply frequency, normally 50 Hz or 60 Hz. Use the motor and capacitor documentation when the application operates at a different frequency. | Motor current, reactance, heating, and performance depend on frequency. Capacitor specifications may also define different permissible operating conditions at different frequencies. | Match the system frequency and verify the capacitor's rated operating conditions before installation. |
| Temperature | Maximum operating temperature | Choose a capacitor with a temperature rating suitable for the motor enclosure and ambient conditions. Common motor-capacitor ratings include 70°C, 85°C, and 100°C. | Capacitance, service life, and dielectric stress are affected by temperature. Heat inside an enclosed motor can be significantly higher than the surrounding room temperature. | Select a rating equal to or higher than the original and allow additional margin for hot locations, restricted airflow, or high-duty-cycle operation. |
| Safety Construction | Failure-disconnect feature | Prefer a self-healing film capacitor with an approved pressure-sensitive interrupter or another manufacturer-specified overpressure protection method. | Self-healing construction can isolate small dielectric faults. An overpressure interrupter is designed to disconnect the capacitor if internal pressure rises abnormally. | Use a component with documented safety construction and do not bypass, remove, or obstruct its pressure-relief mechanism. |
| Safety Compliance | Applicable approvals and markings | Check for certification markings required in the installation region and confirm that the part is rated for the intended motor application. | Electrical approvals address insulation, flammability, endurance, and construction requirements. The required approval depends on the country, equipment, and installation standard. | Verify the marking against the relevant certification database or technical datasheet rather than relying on appearance alone. |
| Physical Dimensions | Can, diameter, length, and mounting space | The replacement must fit the available enclosure, bracket, clamp, and ventilation space. Compare all dimensions in millimetres or inches. | A capacitor that fits electrically may still interfere with wiring, cooling, moving parts, or the motor housing. | Measure the original component and the available space before ordering. Include clearance for terminals and cable bending. |
| Terminals | Terminal style and connection security | Match the terminal arrangement, such as single, dual, or multiple push-on tabs, and ensure the terminal size is compatible with the existing connector. | Loose, incorrectly sized, or incorrectly shared terminals can create resistance, heat, arcing, and intermittent motor operation. | Photograph and label the wiring before removal. Replace damaged connectors and ensure every connection is tight and insulated. |
| Mounting Method | Stud, clamp, strap, or bracket mounting | The body and mounting hardware must support the capacitor securely without crushing, puncturing, or stressing the case. | Vibration and mechanical stress can damage terminals, seals, and the internal winding. | Use the correct clamp or bracket. Do not drill into the capacitor case or overtighten a strap around it. |
| Environmental Rating | Moisture, vibration, and enclosure conditions | Confirm that the capacitor construction is suitable for the installation environment, including outdoor, humid, dusty, vibrating, or washdown locations. | Moisture and contamination can reduce insulation resistance, while vibration can fatigue terminals and internal connections. | Follow the capacitor's stated environmental limits and protect it from water ingress, excessive dirt, and direct heat sources. |
| Testing Safety | Discharge and isolation procedure | Disconnect power, lock out the circuit, verify absence of voltage, and discharge the capacitor using an appropriate resistor-equipped discharge tool. | A capacitor can retain a hazardous charge after power is removed. Directly shorting the terminals can create sparks, damage terminals, and create a safety risk. | Only qualified personnel should test or replace the component. Confirm zero voltage before touching the terminals. |
| Final Verification | Electrical and mechanical match | Confirm that capacitance, voltage, frequency, temperature, safety construction, dimensions, terminals, and mounting method all meet the application requirements. | Matching only one specification, such as µF, does not guarantee safe or reliable operation. | Test the motor after installation for abnormal noise, overheating, vibration, current imbalance, and proper rotation. |

Important: Always follow the motor, appliance, and capacitor manufacturer's specifications. The capacitor's voltage rating is not a substitute for correct capacitance, and a physically compatible part may still be electrically unsuitable. Disconnect and discharge the circuit before inspection or replacement.
Choosing the right run capacitor starts with the motor’s nameplate and the original component. Match the microfarad rating exactly. Use the same voltage rating or a higher approved rating. Never guess from the capacitor’s shape. A swollen case, oily residue, or burnt terminal indicates possible failure.
Turn off the disconnect and verify zero voltage with a properly rated meter. A capacitor can retain a dangerous charge after power is removed. Qualified technicians use an approved discharge method before touching the terminals. Photograph the wiring, then remove one wire at a time. Secure the replacement firmly, keep terminals tight, and prevent wires from touching the housing.
Test before replacing blindly. Isolate at least one capacitor terminal, then measure capacitance with a meter designed for that function. Compare the reading with the labeled tolerance. Low capacitance can cause slow starting, overheating, or noisy operation. After installation, restore power and observe startup, airflow, motor sound, and running current. I still recheck the connections, because a loose terminal can imitate a bad capacitor. A failed capacitor may also reflect motor stress, poor airflow, or repeated overheating. If symptoms remain, stop testing and arrange professional diagnosis rather than installing a larger capacitor.


All of Hapco's formulations are completely free of Mercury.

Hapco has been in business for over 50 years!
*NOTICE* Hapco will be will be closed on Monday, May 26th, in observance of Memorial Day. |
| Cookie | Duration | Description |
|---|---|---|
| cookielawinfo-checkbox-analytics | 11 months | This cookie is set by GDPR Cookie Consent plugin. The cookie is used to store the user consent for the cookies in the category "Analytics". |
| cookielawinfo-checkbox-functional | 11 months | The cookie is set by GDPR cookie consent to record the user consent for the cookies in the category "Functional". |
| cookielawinfo-checkbox-necessary | 11 months | This cookie is set by GDPR Cookie Consent plugin. The cookies is used to store the user consent for the cookies in the category "Necessary". |
| cookielawinfo-checkbox-others | 11 months | This cookie is set by GDPR Cookie Consent plugin. The cookie is used to store the user consent for the cookies in the category "Other. |
| cookielawinfo-checkbox-performance | 11 months | This cookie is set by GDPR Cookie Consent plugin. The cookie is used to store the user consent for the cookies in the category "Performance". |
| viewed_cookie_policy | 11 months | The cookie is set by the GDPR Cookie Consent plugin and is used to store whether or not user has consented to the use of cookies. It does not store any personal data. |